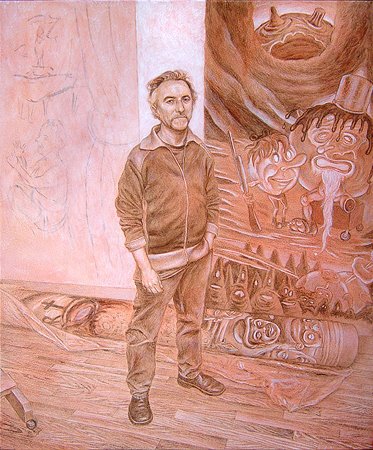
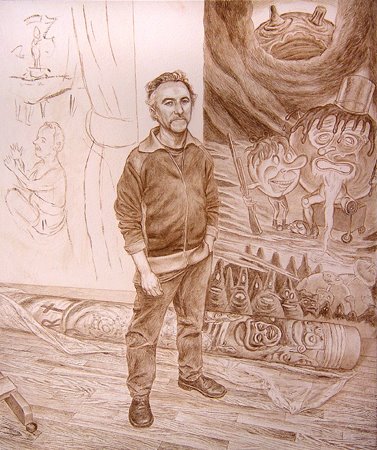
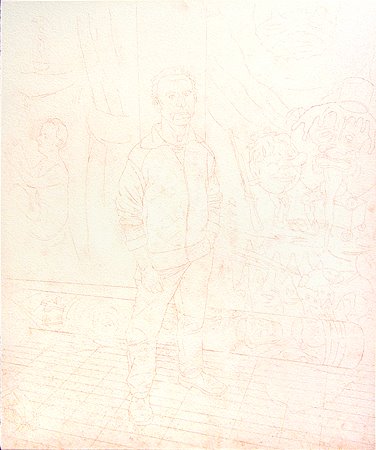
Saturday, September 30, 2006

David Sandlin in His Studio (work in progress, 7)

Front surface

Back of panel

While I normally prepare my own boards with home-made rabbit-skin glue gesso, this time I'm painting on a vintage, commercially prepared gesso panel. I recently bought a number of panels, probably manufactured in the 1940s-50s, from the estate of Athens, GA, artist Frank Ruzicka. The panels have a rough, spattered texture instead of the usual smooth finish. The gesso was obviously sprayed on. It's a nice surface to work on. I've seen temperas by Reginald Marsh from the '40s on boards with a similar surface. This is a 24 x 30 panel that I cut down to size.

David Sandlin in His Studio (work in progress, 6)

Step 6

I have just started working across the image with white casein. Some passages are scumbled, or kind of broadly washed, most are built up with small hatch marks. With casein, I've found that if I dilute the white too thinly in washes, it may look wonderfully subtle and perfect, but when I come back over it with the first washes of egg tempera colors, the palest white washes have a tendency to disappear. I'll continue refining the forms and details with white a bit longer before I return to the darker values.

Friday, September 29, 2006

David Sandlin in His Studio (work in progress, 5)

Step 5

I have now brushed over the whole panel with a couple of thin veils of Venetian red casein washes. I'm not worried about the uneven application of color. There's a lot more that needs to occur to the underpainting. This step provides a nice middle-ground value and injects a warm glow that will affect all the subsequent colors to follow on top of it. I'll work into the image next with white casein to bring back lighter values, and also punch up the darker values with black. The casein I'm using on this painting is Shiva brand tube colors. I sometimes mix dry pigments into straight casein emulsion, but the tubes are pretty convenient.

Thursday, September 28, 2006

David Sandlin in His Studio (work in progress, 3 &4)

Step 3

I've started working over the transfered chalk lines with dilute burnt umber casein paint and a fine brush. Casein is a relative of egg tempera, but instead of using egg yolk as a binder for the pigment it uses a milk-based glue. You can still see some of the red chalk indications and I have begun to model the figure's forms with washes of casein and hatchwork.

Step 4

Here's the more complete state of the initial underpainting. I try to develop a lot of the detail and values that will guide the color work to follow.

David Sandlin in His Studio (work in progress, 2)

Step 2

This faint image shows the results of transfering the composition from the original drawing to the gessoed panel. I made a tracing of the drawing onto "vellum," a.k.a. tracing paper. Across the back of the vellum I rubbed a coating of red-earth chalk. Actually, the chalk is a chunk of naturally pigmented, dry clay purchased from an art supply store in Florence, Zecchi, and really well suited for this purpose. I fix the tracing to the panel, chalk side down, and draw over the lines again to impress them onto the surface of the gesso. It's like using a carbon paper to make a copy. What's the point of going to all this trouble, you might ask? Why not just draw an image directly onto the gesso? Well, rabbit-skin glue gesso is very absorbant and fairly soft. I mess up a lot when I'm trying to find the forms in a composition. This way I can work out a lot of the initial problems on paper and erase or redraw as often as need be without mussing up the gesso surface. When I finally get the drawing right, or close to it, it's a simple matter to dupe it to the panel. The next step is to reinforce the transferred image. Some people use dilute India ink, or egg tempera. Lately, I've preferred to use casein paint.

Below is a photo of my pieced-together vellum. The blue dots are just some adhesive drafting tabs I had on hand that I used as tape.


Wednesday, September 27, 2006

David Sandlin in His Studio (work in progress, 1)

Step 1

Here's the drawing I'll start with, on paper the same size as my panel, 24 x 20 inches. Basically just the contours of all the elements in the picture. I'll work more on David's likeness on the panel itself.